Indice dei contenuti
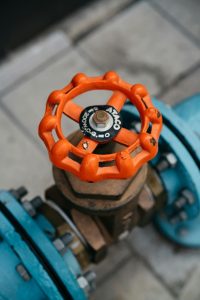
Attiva/disattivaControlla le valvole play a vital role in fluid systems by permitting flow in one direction while preventing backflow.
When considering installing a check valve, it’s essential to understand the right process.
Installing check valves involves several key steps to ensure optimal performance and prevent issues like water hammer.
From preparing clean pipes to proper valve placement, attachment, and testing, the process varies depending on the valve type.
Continuate a leggere per saperne di più.
What Are the Functions of a Check Valve?
Prevention of Backflow
Check valves play a crucial role in preventing the reversal of fluid or gas flow, ensuring the protection of equipment, and maintaining the integrity of the system.
Avoidance of Water Hammer
By halting reverse flow, check valves effectively mitigate water hammer, preventing sudden and damaging pressure surges that can impact piping systems and equipment.
Fugitive Emissions Control
Check valves contribute to environmental safety by containing fluids and gases within designated areas, minimizing the risk of pollution and hazards associated with leaks.
Pressure Balancing and Relief
Regulating pressure within systems, check valves release excess pressure when needed to uphold optimal operational conditions.
Protective Devices
Functioning as protective barriers, check valves safeguard equipment from damage caused by backflow, preventing burnouts, mix-ups of media, or contamination.
Maintenance of System Performance
Check valves uphold system efficiency by preventing backflow, preserving smooth operations, and safeguarding overall performance.
Safety Measures
Enhancing safety protocols, check valves also prevent cross-contamination and protect personnel from exposure to hazardous materials, which mitigates the risk of explosions or fires.
These multifaceted functions underscore the vital role of check valves across diverse industries, including manufacturing, transportation, and utilities.
How to Install a Check Valve
To begin installing a check valve, check the following steps to ensure accuracy:
Step 1: Preparation
- Ensure pipes are clean and debris-free before installation.
- Move the flapper by pushing it away from the seating surface to ensure free movement.
Step 2: Check Valve Placement
- Identify the arrow on the valve indicating the flow direction.
- Position the valve accordingly in the pipeline (horizontal or vertical).
- Turn off the main water supply during installation.
Step 3: Attaching the Check Valve
- Attach the check valve to the pipeline.
- Depending on the type, screw it to the pipe or secure it using a wrench until the parts are sturdy and secure.
Step 4: Testing the Check Valve
- Turn on the main water supply to test functionality.
- If water is blocked during testing, uninstall and disassemble for evaluation.
- Thoroughly clean the valve to remove debris and ensure proper water flow.
Step 5: Considerations
- Installation steps may vary based on the check valve type.
- For instance, swing check valves are limited to specific flow orientations.
- Follow the manufacturer’s instructions for proper installation, ensuring optimal function and system integrity.
Can a Check Valve Be Installed Vertically?
Yes, check valves can be installed vertically, depending on the type. Note that the arrow on the check valve indicates the proper positioning concerning the pipe’s flow; for vertical installations, ensure the flow arrow points upwards.
Chiave da asporto
When installing a check valve, precision and adherence to proper procedures are paramount.
The process of installing a check valve involves careful consideration of its installation position.
This ensures optimal functionality, preventing issues like backflow and water hammer. Proper installation begins with preparation—ensuring pipes are clean and free of debris.
Understanding the check valve installation position, marked by a flow direction arrow, is crucial.
Whether for horizontal or vertical application, the steps involved, from attachment to testing, require attention to detail.
Following manufacturer guidelines guarantees a successful installation, safeguarding the system’s integrity and functionality.