
Gate valves are essential in controlling large amounts of water in pipelines. Unfortunately, when they malfunction or leak, they can be highly hazardous to plants and equipment.
Therefore, they should be checked frequently and replaced when they begin to leak.

Dealing With a Leaky Gate Valve
- Inspect & Avoid
Inspecting is the first step to preventing leaks and costly repairs. Don’t wait for it to fail. Check if the valve is aligned with the flange or pipe to avoid stress that could cause leaks.
If the handle feels off, adjust it to ease pressure and keep it working smoothly. Clean the valve regularly to remove dirt and corrosion that might cause blockages.
Flush the valve with water to clear sediment and keep water flowing properly.
- Clean
Keeping your gate valve clean helps stop leaks and keeps it working right. In water systems, dirt and debris can build up inside and make it hard to shut off.
Cleaning a leaking gate valve is easy. Grab a screwdriver, wrench set, and seat removal tool, and you’re good to go. Regular maintenance keeps blockages from causing bigger issues down the line.

- Replace
Sometimes, a gate valve will not fully close, and water may still flow through it even after being shut off. Not only is this situation frustrating, but also potentially hazardous.
If the handle of your gate valve is stuck, loosen the packing nut above and around the valve body. Lowering the gate repeatedly will break free any sediment buildup and flush it away.
If the issue persists, you may need to replace your gate valve. Be sure to select the right type for your requirements and location
- Repair
Gate valves can fail if they don’t fully close or if sediment builds up inside. They may also leak if they’re damaged or not the right size for the job.
If your gate valve is leaking, start by checking where the leak is coming from. Leaks usually happen around the stem.
A leak here might mean the packing nut isn’t tight enough. Gently tightening it should stop the leak, but don’t overtighten or it may become hard to turn later.
If water still seeps from the valve stem, replacing the packing material under the nut can provide a lasting fix.
Common Gate Valve Problems and How to Fix Them
Gate valves are great—until they stop working when you need them most.
Whether it’s refusing to close, staying stuck open, or not opening at all, these issues can throw a wrench in your system.
Let’s go over what might be going wrong and how to fix it.
Gate Valve Won’t Close
If your gate valve won’t close, sediment buildup inside the valve could be the culprit. Over time, dirt and debris collect, making it hard for the gate to fully shut.
Try closing the valve as much as possible and flushing the system by opening a nearby faucet. If that doesn’t work, you might need to remove the valve and clean it manually.
In some cases, a replacement may be the only solution if the buildup is too severe.
Stuck Open Gate Valve
A stuck open gate valve can be just as frustrating. This usually happens due to corrosion or lack of use.
The first step is to shut off the water supply and apply penetrating oil around the valve threads. Let it sit for a few minutes, then try gently tapping the handle to break it loose.
If that doesn’t help, using a wrench for extra leverage might do the trick—but be careful not to force it too much.
Gate Valve Won’t Open
If your gate valve won’t open, the issue might be internal rust or a seized stem.
Start by inspecting the valve for visible corrosion. Applying lubricant and letting it soak in can sometimes free up the mechanism.
If that doesn’t work, you may need to disassemble the valve and check for worn-out parts that need replacing.

Customize the perfect valve for your project! Get a quote and explore our custom options.
Performing a Gate Valve Repair
Repairing a gate valve isn’t too complicated, but it does require some attention to detail. Here’s how you can tackle it step by step.
1. Turn Off the Water
Before doing anything, make sure you turn off the main water supply. No one wants water gushing while you’re working.
2. Disconnect the Valve from the Pipes
Next, you’ll need to unbolt the flanged ends to disconnect the valve from the pipes. It’s a simple job, but make sure you have a good grip. You don’t want to strip any bolts.
3. Loosen the Valve Bonnet
Use pliers to loosen the bonnet. It’s a simple step, but don’t touch the packing nut—it’s there to prevent leaks around the stem. Leave it in place.
4. Separate the Top and Handle
Once the bonnet’s off, you can separate the valve’s handle and the seating from the body. Now, you’ll have a clear view of the internal parts.
5. Inspect the Valve
Take a good look at everything. Look for signs of wear, corrosion, or anything that looks out of place. You may need to replace parts, especially if there’s damage to the gate valve stem. If everything looks fine, give everything a good clean with a small brush.
6. Rebuild the Valve
If you need to replace any parts, do it now. Position the gate in the body, screw the bonnet back on, and tighten it. Turn the handle to make sure the valve opens and closes fully. If it works, you’re good to go.
7. Reinstall the Valve
When putting the valve back on the pipes, it’s a good idea to use industrial valve sealant tape to ensure there are no leaks when you turn the water back on.
Gate Valve Stem Replacement a Ball Valve
If you’re switching out your old gate valve for a ball valve, you’re making a good choice. Ball valves offer a more secure seal and generally last longer, but they do require a bit more work to install.
- Heat the Valve Parts: Before removing the old valve, grab a torch and heat up the joints and stem of the gate valve. This makes it easier to remove.
- Turn Off the Water: Drain the pipes by turning off the water, and open the valve. This relieves pressure in the system.
- Use Channel Locks: Once the parts are heated, grab the valve with channel locks. If it doesn’t budge, try applying heat to the elbows and give it some lateral pressure.
- Install the Ball Valve: Finally, remove the old valve and install the ball valve. It’s a simple process once everything’s heated and loosened.

Frequently Asked Questions
Are ball valves better than gate valves?
Yes, ball valves tend to be better. They respond faster and seal better, so they’re usually the more reliable choice for certain setups.
Why is my gate valve leaking?
If it’s leaking, it’s probably not closing all the way, or it could be damaged or just the wrong size for the job. Sometimes, it’s a design issue too.
Can gate valves fail?
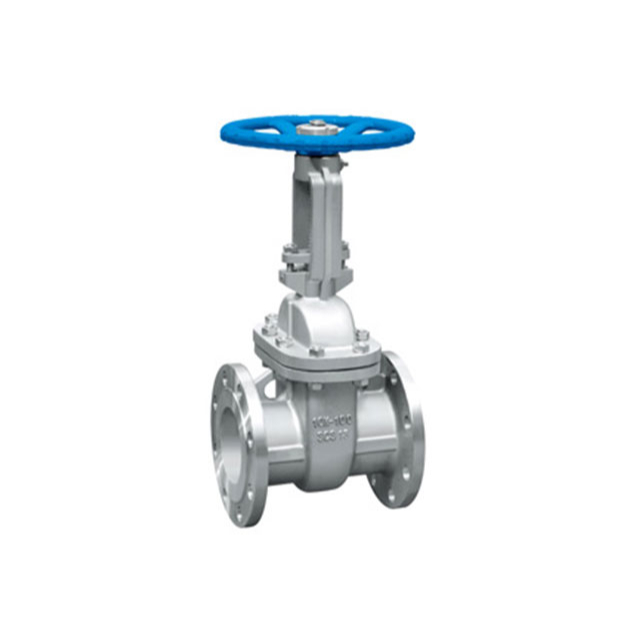
For sure. Over time, gate valves can fail because of wear, corrosion, or just damage. That’s why it’s good to check them now and then.
What tools should I have in my gate valve repair kit?
You’ll want a seat removal tool, a screwdriver, and a wrench set. Those should handle most repairs you’ll run into.

Conclusion
If you’re looking to replace a valve, we’ve got you covered with our high-quality gate valve selection. But if you need something else, don’t worry—we have a broad range of valves to suit your needs.
From ball valves to butterfly valves and check valves, our industrial valves collection has everything you need. Whether you’re dealing with high-pressure systems or complex applications, we offer valves in a variety of designs and materials, including bronze, stainless steel, carbon steel, and more.
Check out our full range of industrial valves here: Xintai Industrial Valves Collection. You’ll find exactly what you need for your project, no matter the size or type.
Need help choosing the right valve? Reach out to us anytime, and we’ll guide you through it!


