Table of Contents
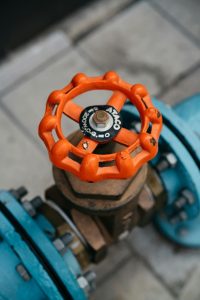
ToggleFlanged ball valves offer reliable performance and easy maintenance. But proper assembly is critical to ensure a leak-tight seal and avoid potential issues. Whether you’re installing a new valve or reassembling after service, following the right procedure is essential.
You need to understand the basics, like what is the connection for a flange end ball valve? The flanged end connections create a sturdy, blowout-proof design rated for high pressures. But incorrect assembly with improper gaskets or uneven loading can lead to leaks, vibration, and premature failures. This guide covers the key steps for correct flange ball valve assembly.
What You’ll Need
Before starting, make sure you have the required gaskets, studs, nuts and any specialized tools on hand. Check that gaskets are the right material, size and pressure rating per the specifications. You’ll also need a torque wrench and the proper lubricants.
Most importantly, consult the manufacturer’s instructions. While there are general guidelines, the specific procedures and torque values can vary by valve size, pressure class and construction.
Assembling a Flange Ball Valve – Step-by-Step Guide
Follow this step-by-step guide to assemble your flange end ball valve:
Step 1 – Inspect Components
Thoroughly inspect and clean all valve components. Look for any damage, warping, debris or defects on the flange faces and sealing surfaces that could compromise the seal integrity.
Step 2 – Install Gaskets
Position the gasket between the two flanges, properly centered around the bore. Make sure it’s sitting flat without any pinching or bunching.
Step 3 – Insert Studs
Insert the flange studs through the bolt holes on one side, extending them out towards the mating flange. Use an anti-seize lubricant to prevent galling.
Step 4 – Align Flanges
Carefully align the two flanges, guiding the studs through the opposing bolt holes. The faces should mate squarely in parallel alignment.
Step 5 – Install Nuts
Start installing the nuts onto each stud by hand. Don’t fully tighten yet, just run them up enough to secure the assembly.
Step 6 – Tighten in Sequence
Using the specified torque values and cross-bolting sequence, gradually tighten the nuts in multiple passes with the torque wrench. This creates an even compression on the gasket.
Step 7 – Final Inspection
Perform a final inspection by checking for any uneven gaps between flanges which could indicate improper seating. If leaks are present, cautiously re-torque the hardware.
Special Considerations of Assembling Flange Ball Valve
It’s important to re-torque the flange hardware periodically, especially after thermal cycles or pressure spikes. This compensates for relaxation and maintains proper loading over time.
For critical services, the gasket surfaces may require specialized gasketing materials or coatings. Insulating kits are available to reduce temperature effects on bolt loading as well.
Conclusion
The small up-front effort of proper valve assembly pays dividends through extended service life and leak-free operation. Always reference the manufacturer’s instructions and torque specifications.
From superior materials to expert engineering, Xintai flange ball valves are built for reliable performance and simple maintenance. Their high-quality line of flanged valves is proven across the most demanding industrial applications. Contact Xintai today for your flanged ball valve assembly and installation needs.